| Table of Contents |
| Flashing Meshtastic |
| Pairing to Android / iPhone (Initial Config) |
| Adding a GPS Module |
Flashing Meshtastic to a T-Deck
-
***WARNING***
Do NOT proceed unless an antenna is connected to avoid possible damage to the device's radio.
- Plug the LilyGo T-Deck into your computer using a USB cord. ***If your computer us not recognizing that a device is being plugged in you may need to install the serial drivers first found HERE.***
- Open a browser, Chrome seems to be most compatible, and visit:
flasher.meshtastic.org

- Select Target Device as LILYGO T-Deck:

- Under Firmware we suggest selecting the latest Stable Beta:

- Then Click Flash:

- Details regarding the firmware version you selected will appear, scroll down and click continue:

- On the next screen ensure Full erase and Install is checked:

- Then click Erase Flash and Install:

- A list of available COM port devices will appear.
- Hold down the Trackball and Turn ON your T-Deck. (***Keep holding down the Trackball.)
- A new COM device will appear. (***Keep holding down the Trackball.)
- Select the New COM device and click Connect. (***Keep holding down the Trackball.)

- As soon as the Flashing process starts you can release the Trackball:

- The process is finished as soon as you see "waiting for download":

- At this point you have successfully flashed the T-Deck firmware.
- To continue to configuration and start using your device simply turn the T-Deck OFF and then back ON.
Pairing a T-Deck to Android / iPhone (Initial Config)
- iPhone:


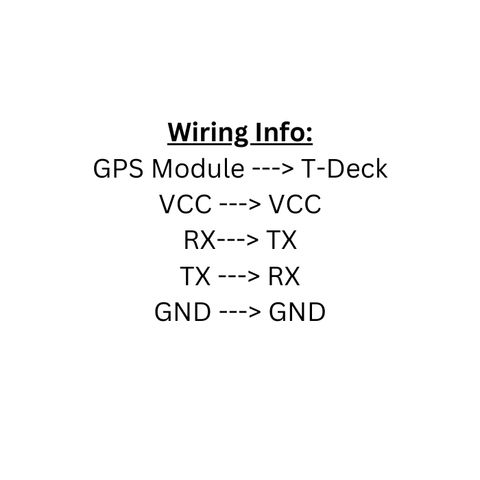
Adding a GPS Module to the T-Deck


 Military and First Responder


